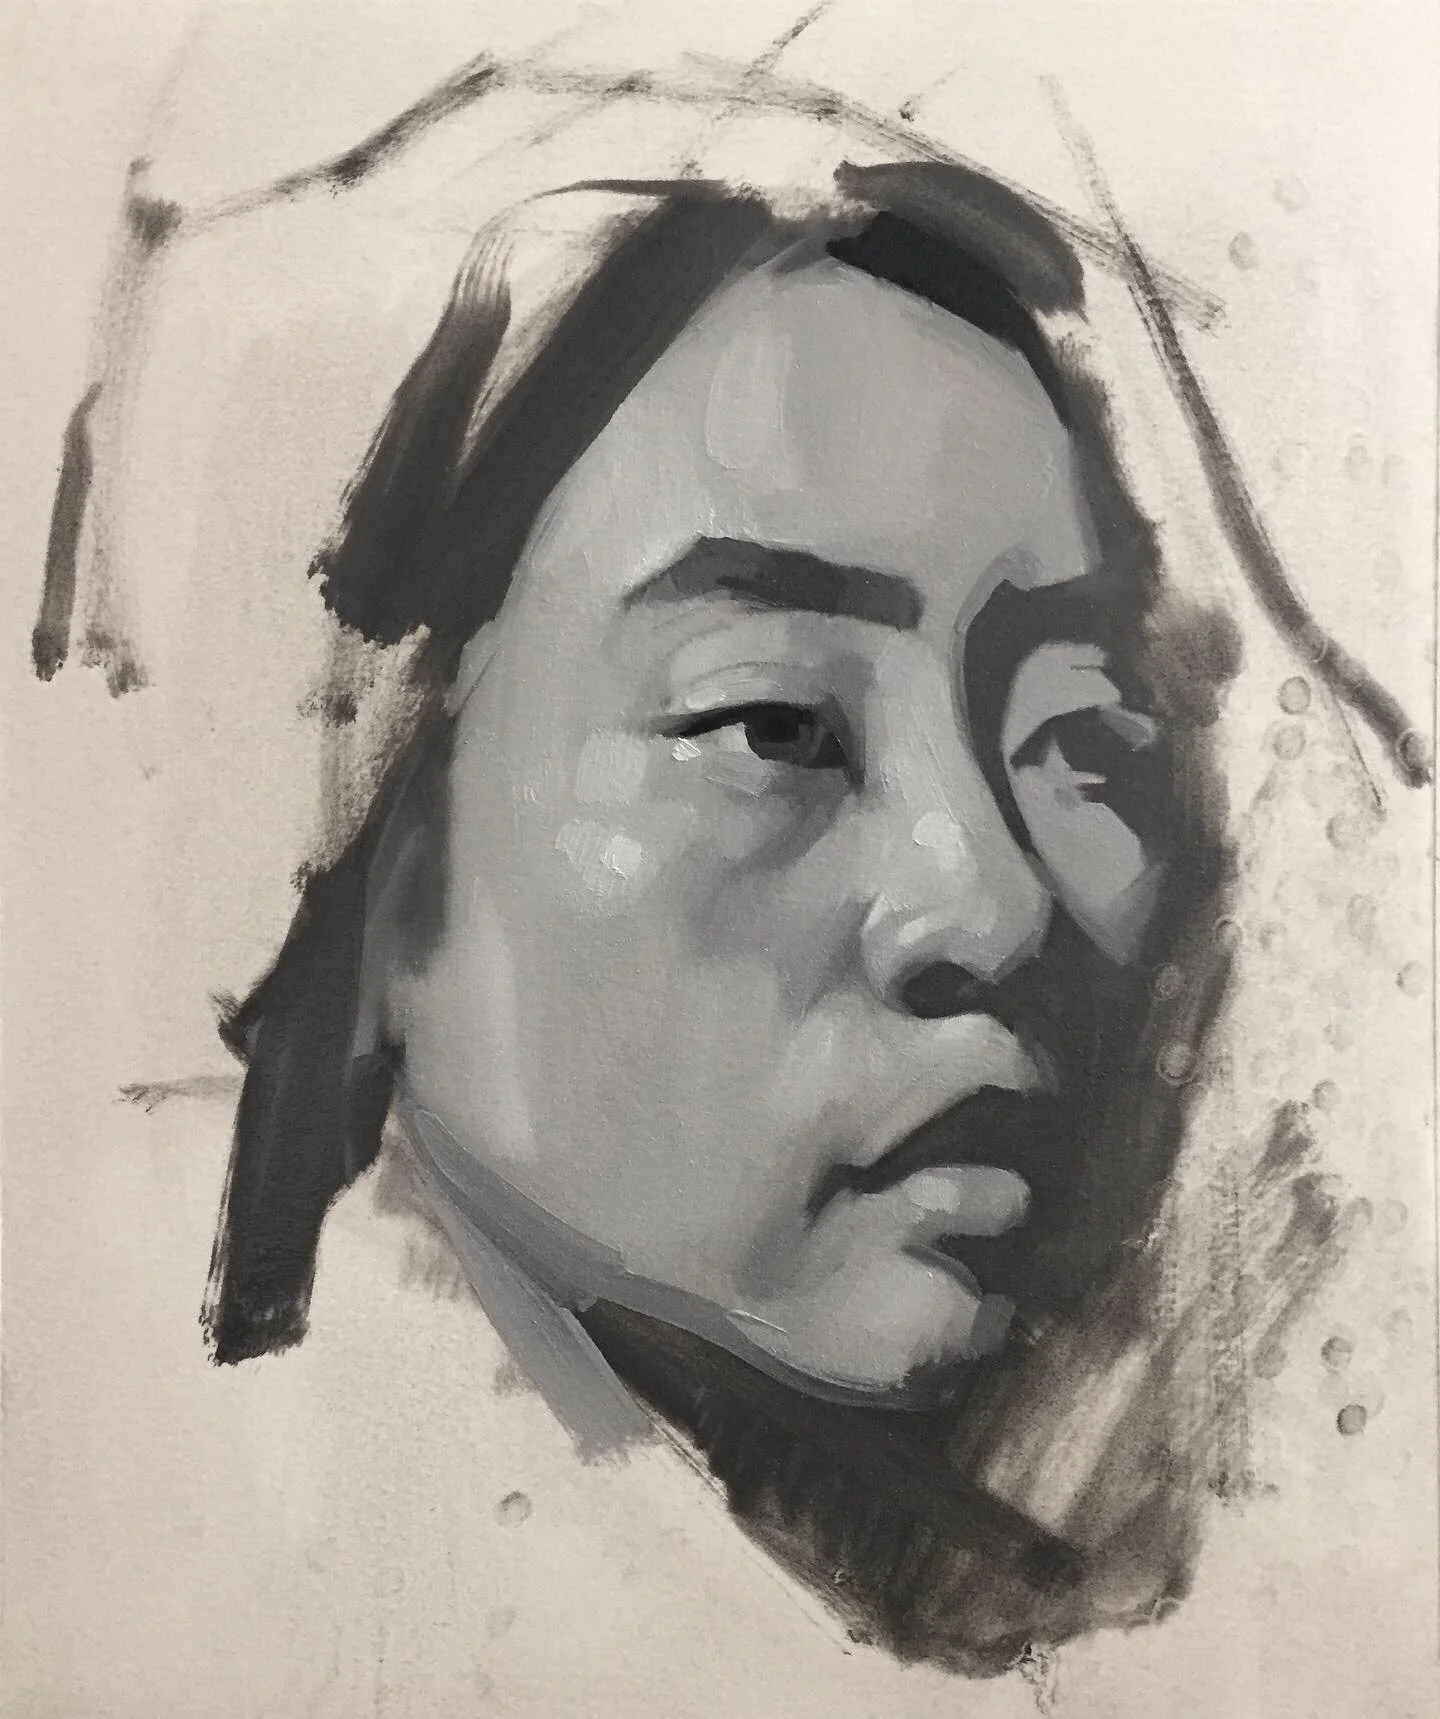
Painting in Only Black and White- in Oil
By taking away color all you need to focus on is mixing value (lighter/darker) and placing it in the right spot (shape) with the right quality of meeting between the spots (edges).
This makes it so much easier to spend your time really considering value accuracy. This is a great exercise to have in your pocket when you need to relieve the mental load of balancing all the tasks of painting in color. It’s like a little vacation. It can also be used to practice values if you are finding yourself getting lost with them in your color paintings. By getting lost I mean putting values that are too light in the dark areas and too dark in the light areas, and in doing breaking the effect of 3 dimensions you are attempting to illustrate.
You will need
A surface to paint on. I used 6” round panel because it was fun.
Brushes, I used long flat bristles in small sizes 1-4
Oil paint: Titanium White , Ivory Black
OMS for thinning paint, and washing brushes.
Paper towels or rags
Instructions
Set up a still-life, paint a model from life, paint a self portrait, or copy a master work. You may also paint from a photograph , but I do not recommend this for beginners.
Why I do not recommend photo reference for beginners: I have noticed that learning to paint from life makes smarter, more skillful painters/thinkers. When painting from life you must take the maximum amount of information and distill it down to something manageable while dealing with limitations like time and changes in your subject. A photo is static and already abstracted to some degree, it’s more like copying rather than choosing and organizing. I see beginners often painting for far too long from a photo, meandering, wrestling… When they could learn faster with a bunch of attempts from life, each offering a chance to observe what didn’t work and adjust. More starts at the beginning is better than finishing. This is my recommendation.
Paint for three hours, no more.
Time your painting time in 20 minute increments, and time your 5 minute breaks between. Don't look at your study while you're on your break.
I suggest you to continue to use my step by step alla prima method from the Sargent Copy Lesson, but instead of mixing average value and color, simply mix average values. I’ll add it below. But, any method you use will be aided by a study honing your ability to see and mix values. If you use a method different than mine and wish for a live critique, please be able to describe your method to me step by step.
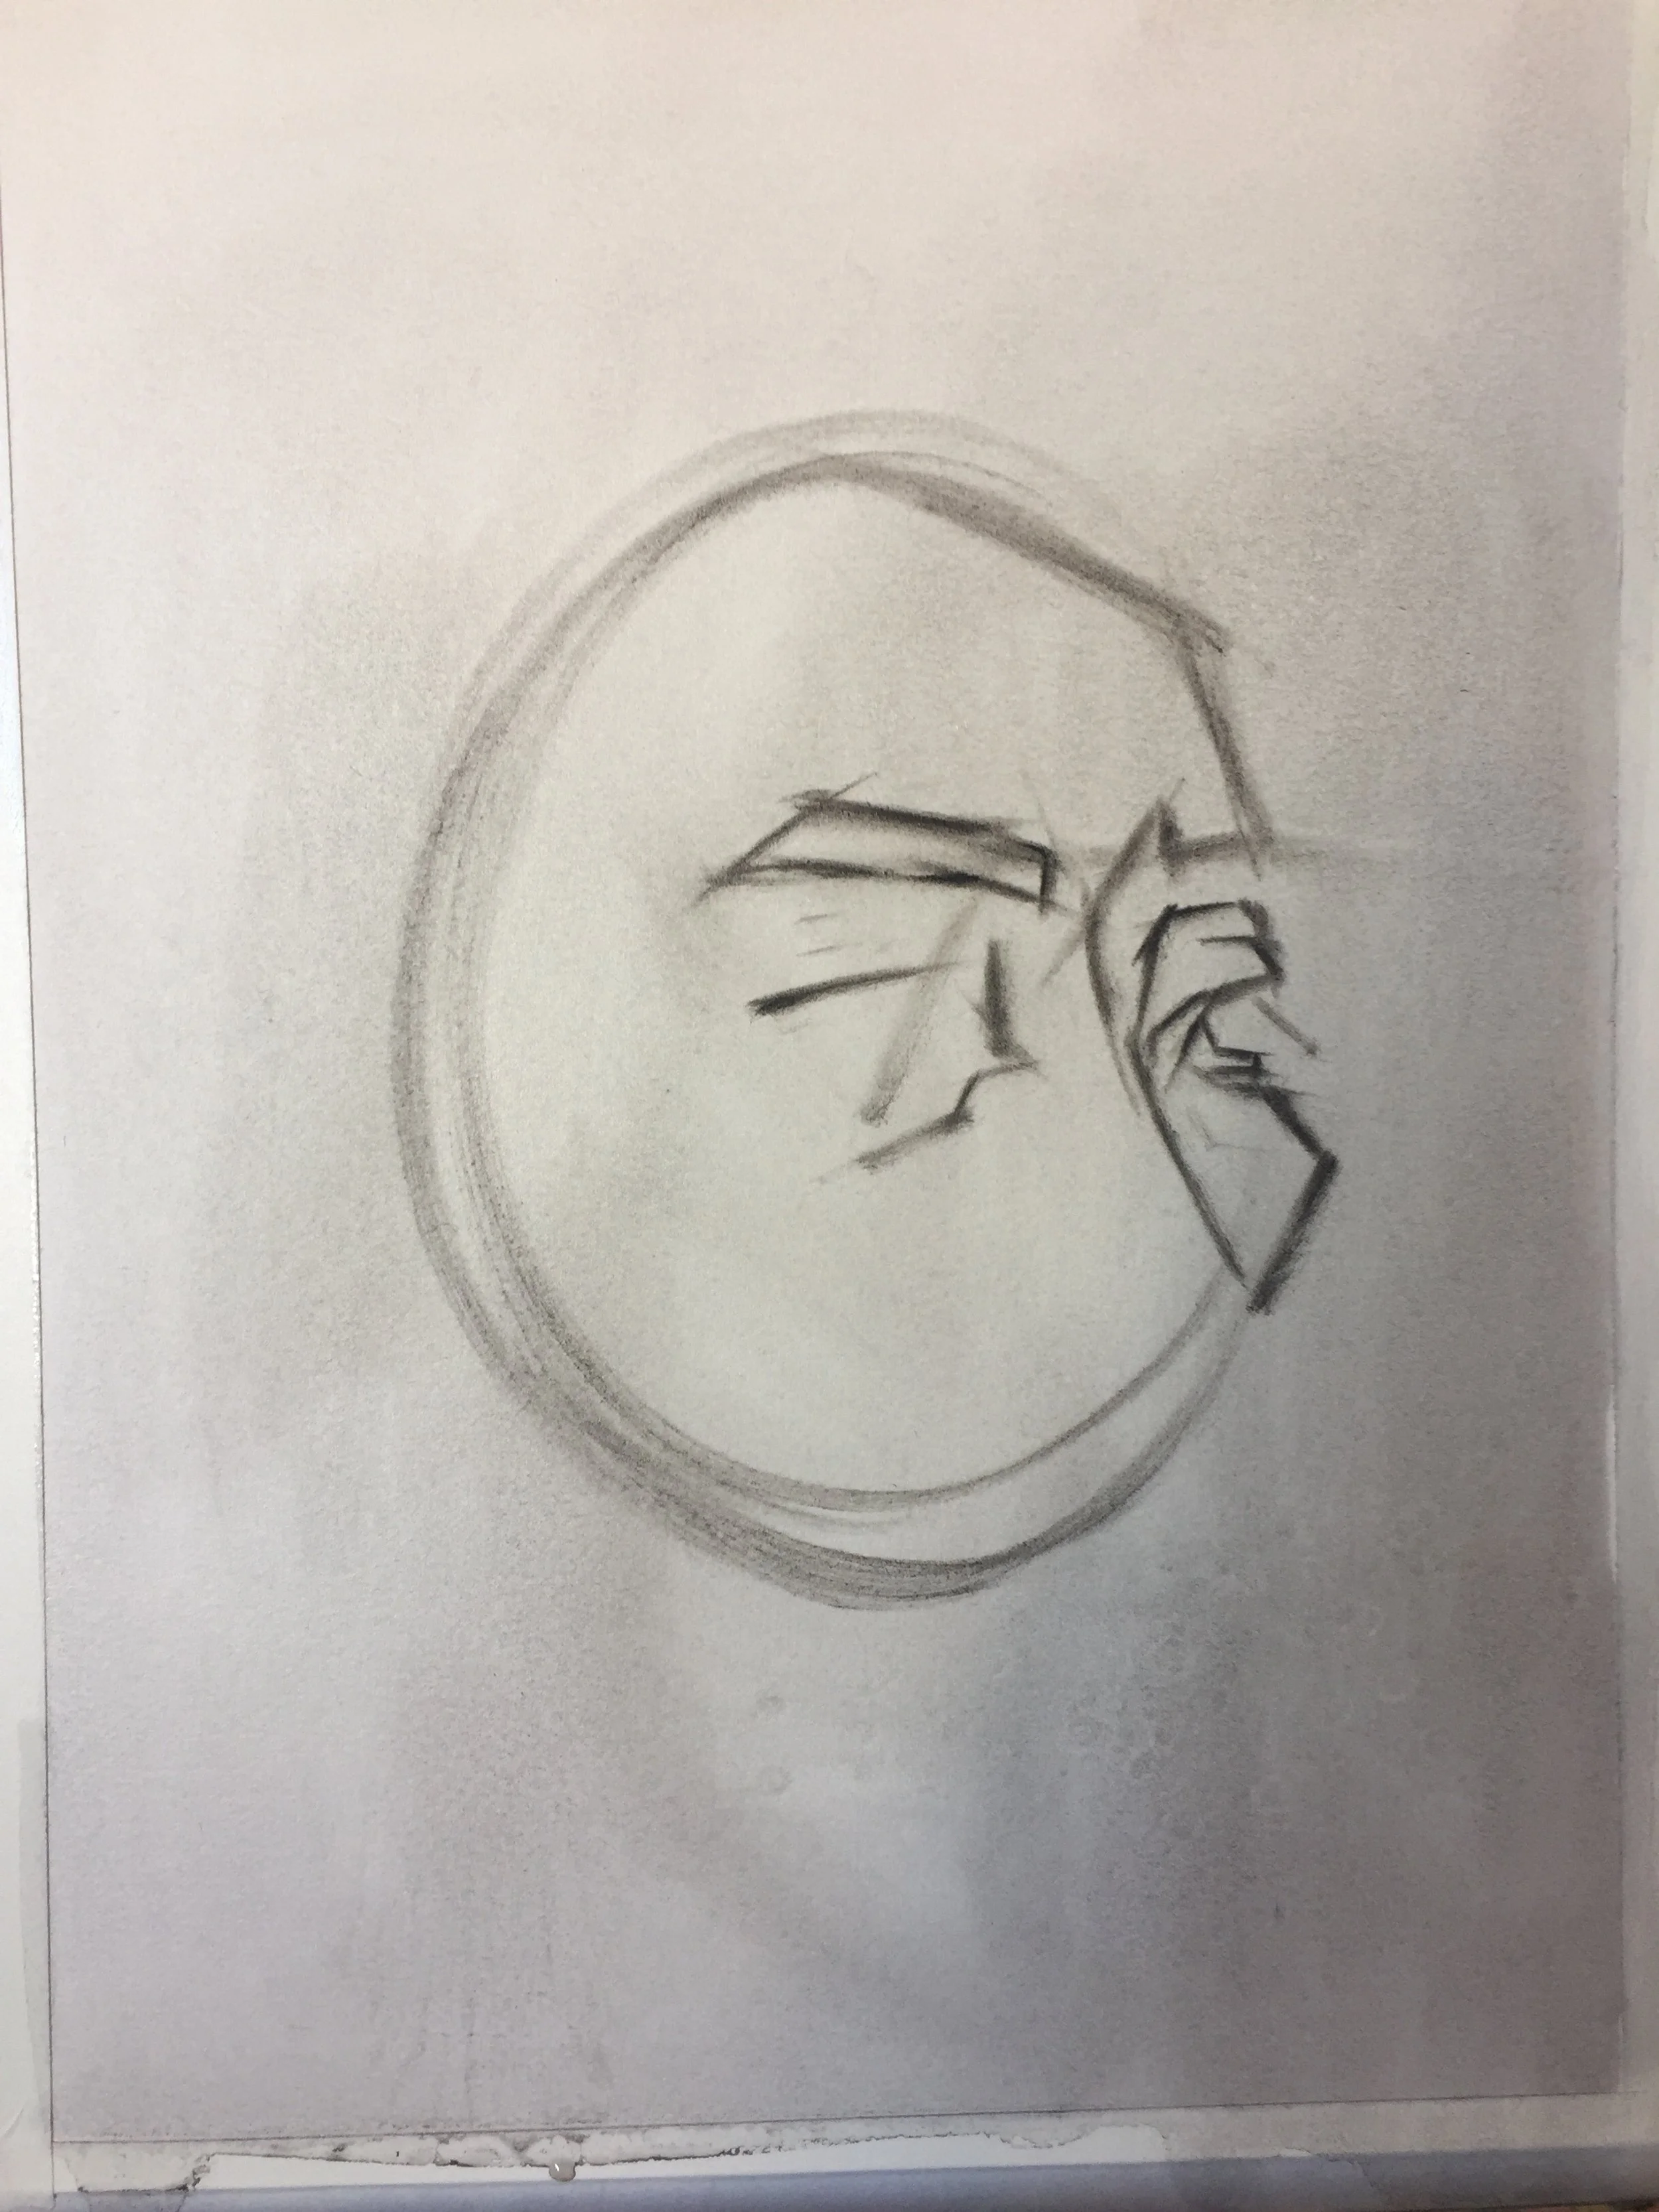
Step 1 - Mix up the average dark value of your subject. Remember that each subject is different so no formula for finding “average” will work in every situation. Think about which choice will allow the most ease going forward and don’t take the word “average” completely literally, it’s really a simplification of concept to get you started. Squint.
Use this to draw your subject, with a small stiff bristle brush. Draw with straight lines for greatest accuracy. Use dry paint, no medium, or very very little medium. You are drawing the dark shapes but not filling them in, DO NOT FILL THEM IN! While drawing with one small bristle brush, I like to use another clean bristle brush with a touch of turp/medium on it as an "eraser", to help correct and perfect my drawing. Clean it thoroughly after each correction. The way to apply this dark paint is thin/dry (not thinned by turp/medium, but pushed into the canvas with your brush) it should feel a bit like drawing with charcoal.
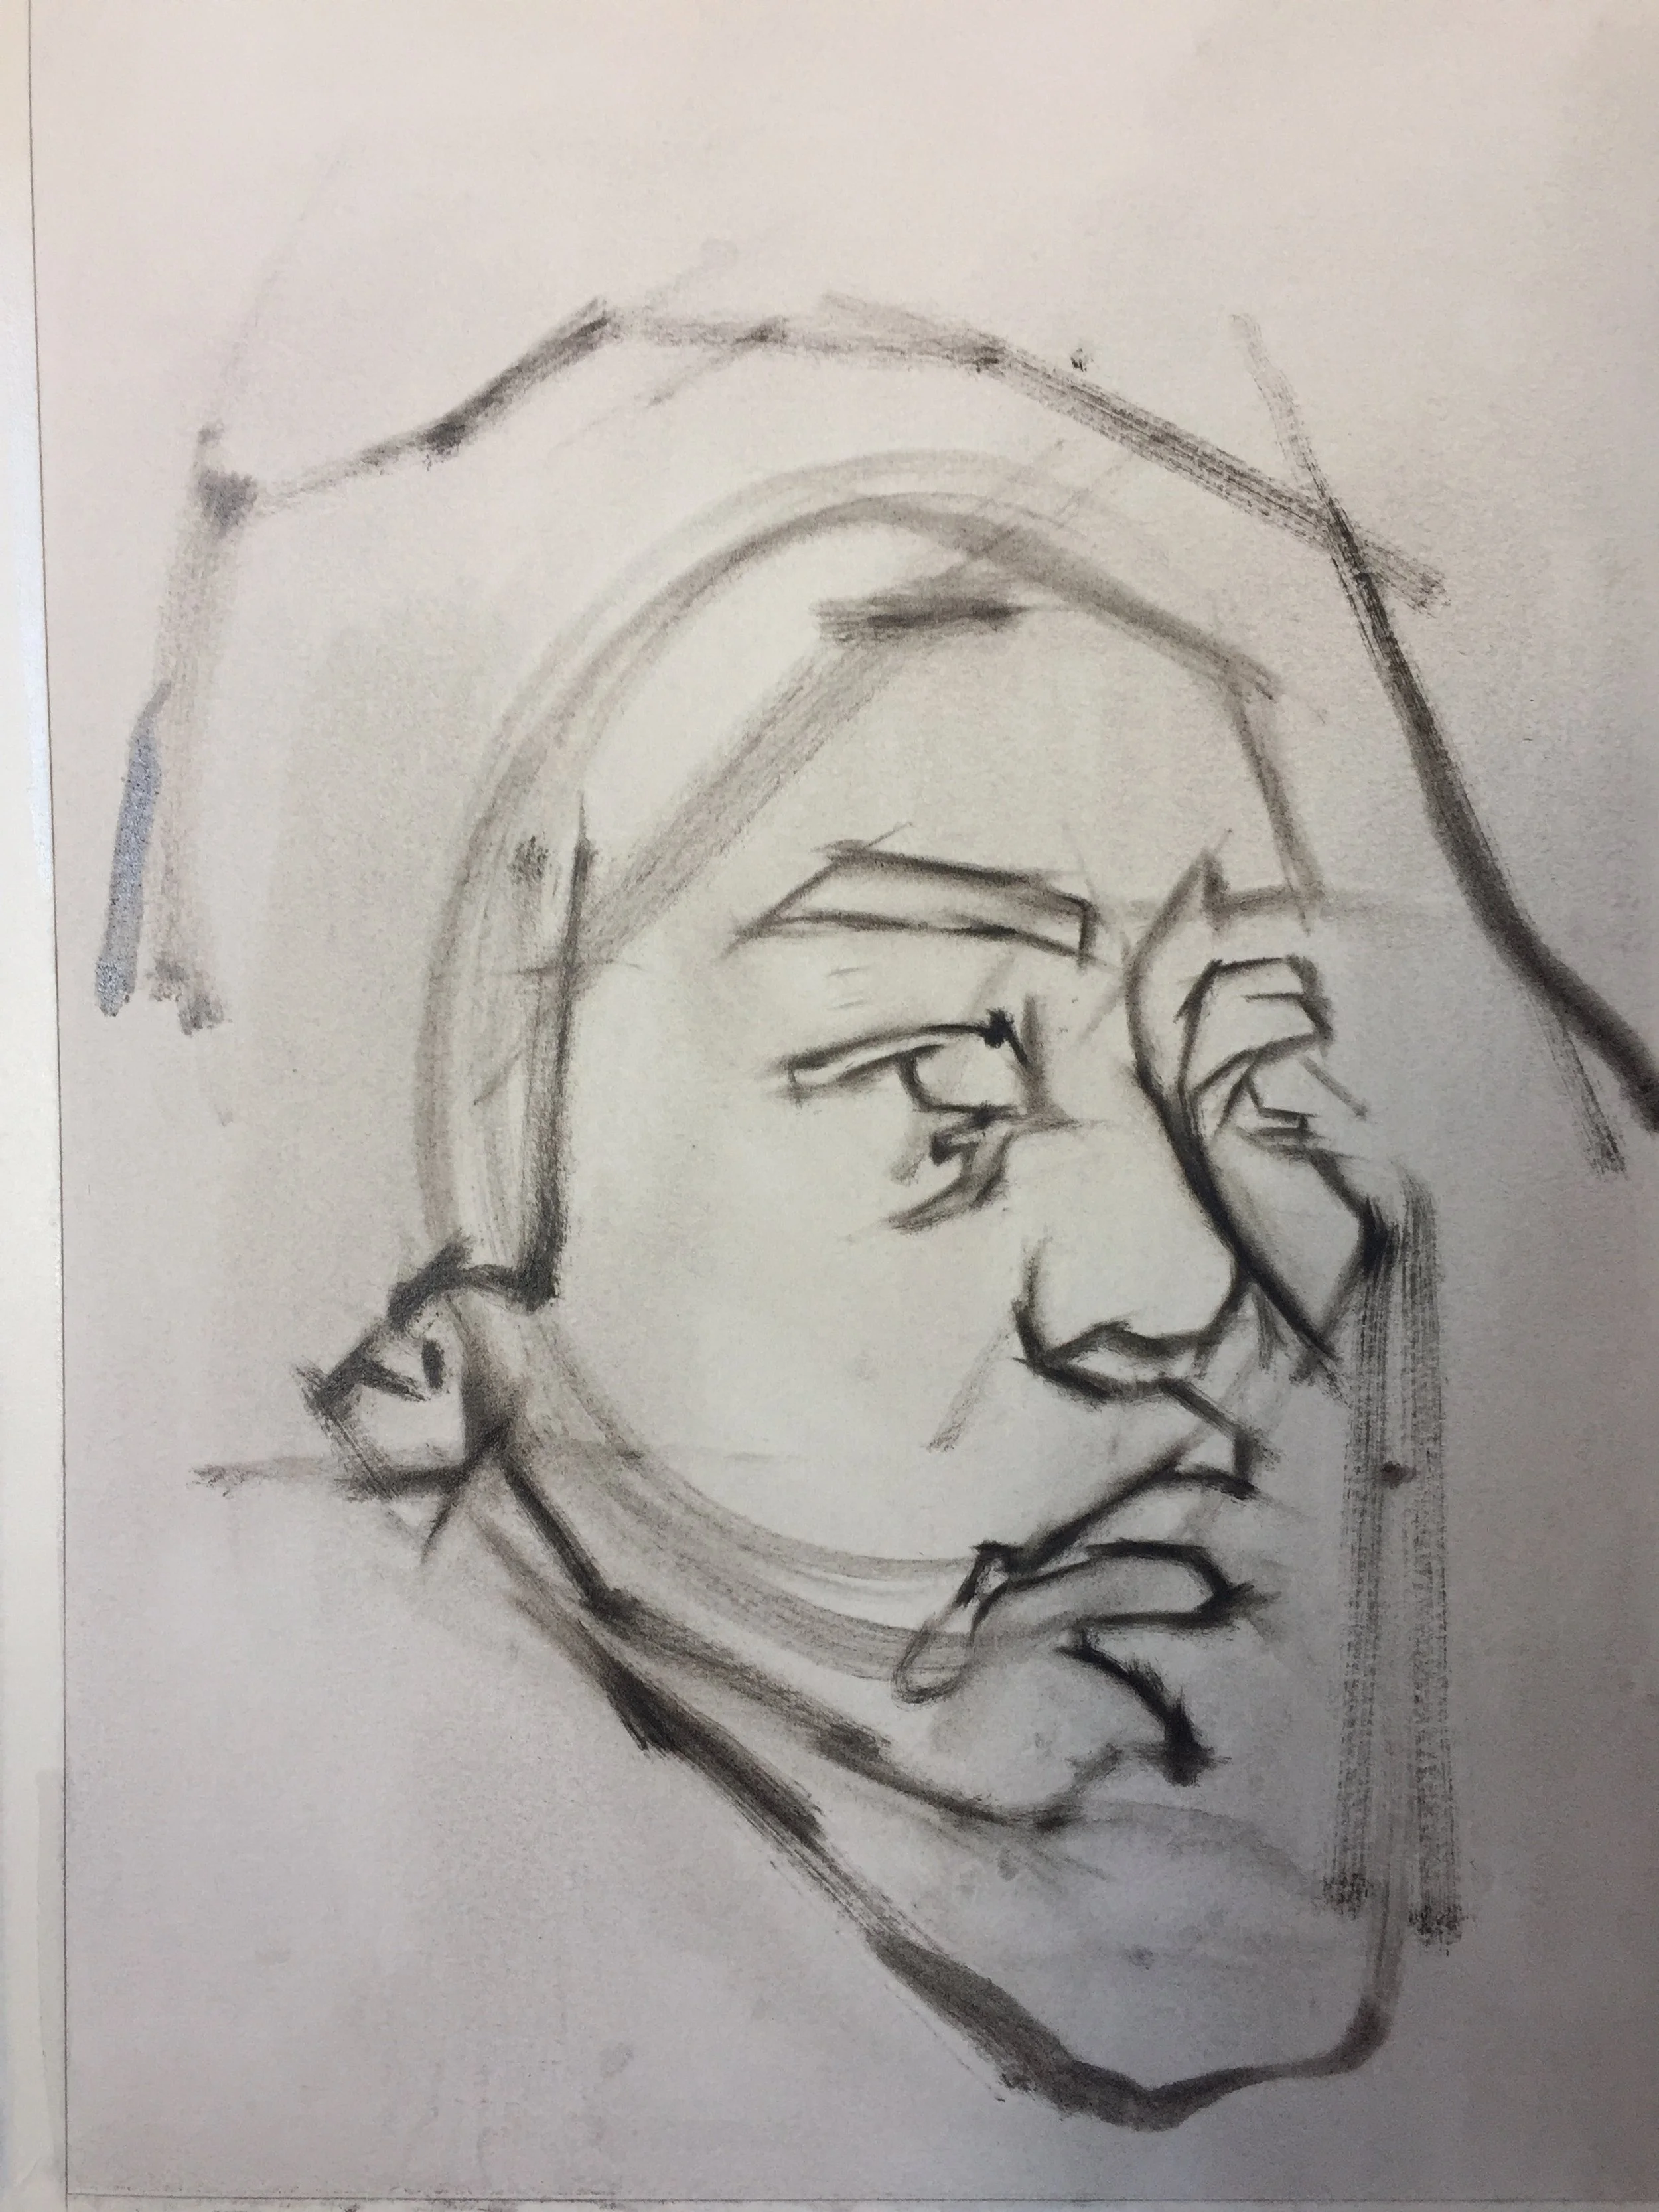
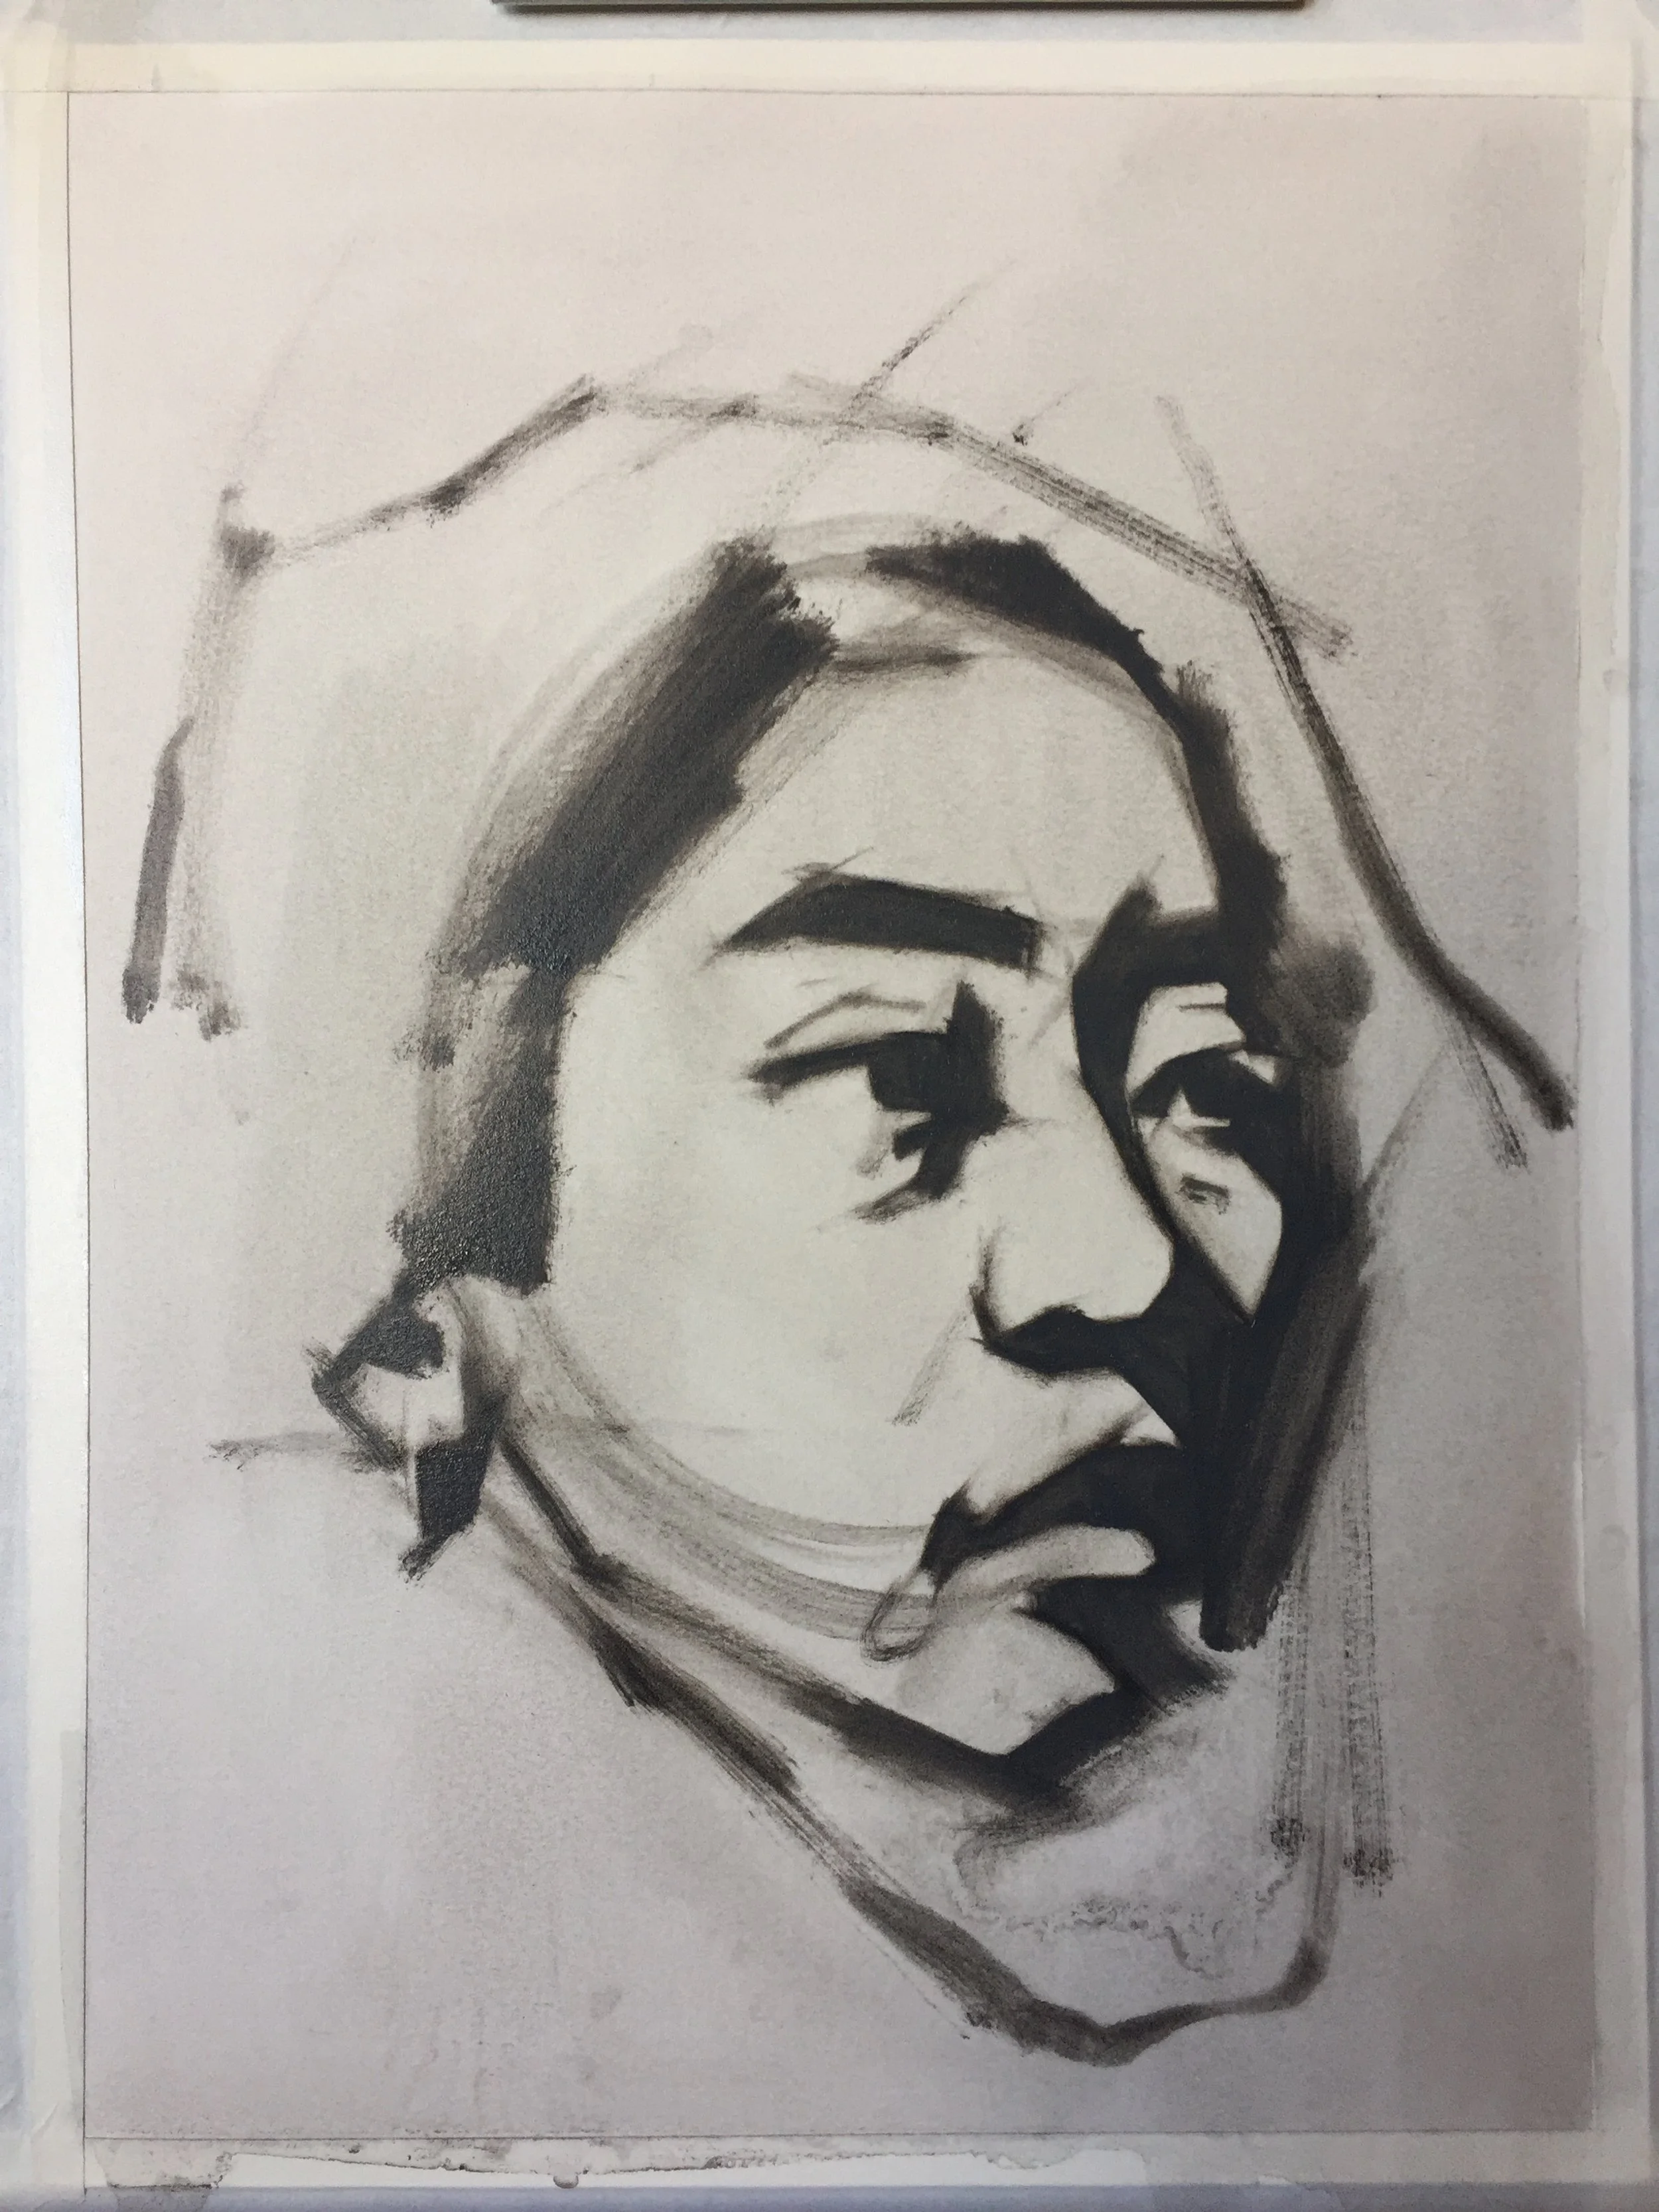
Step 2 - Once you have your drawing mapped out and all of your shapes are accurate, you may then fill in your darks using the drawing value (unless you decide yoiu need to adjust it). Fill them in uniformly, you do not want to create many new values or shapes within the darks by haphazard fill in. Keep the paint thin and dry (but not so thin as to change your intended value). I do not thin it by adding oms , I simply scrub it in. For me, being in control of the consistency of my paint is one of the most important tools in creating successful work.
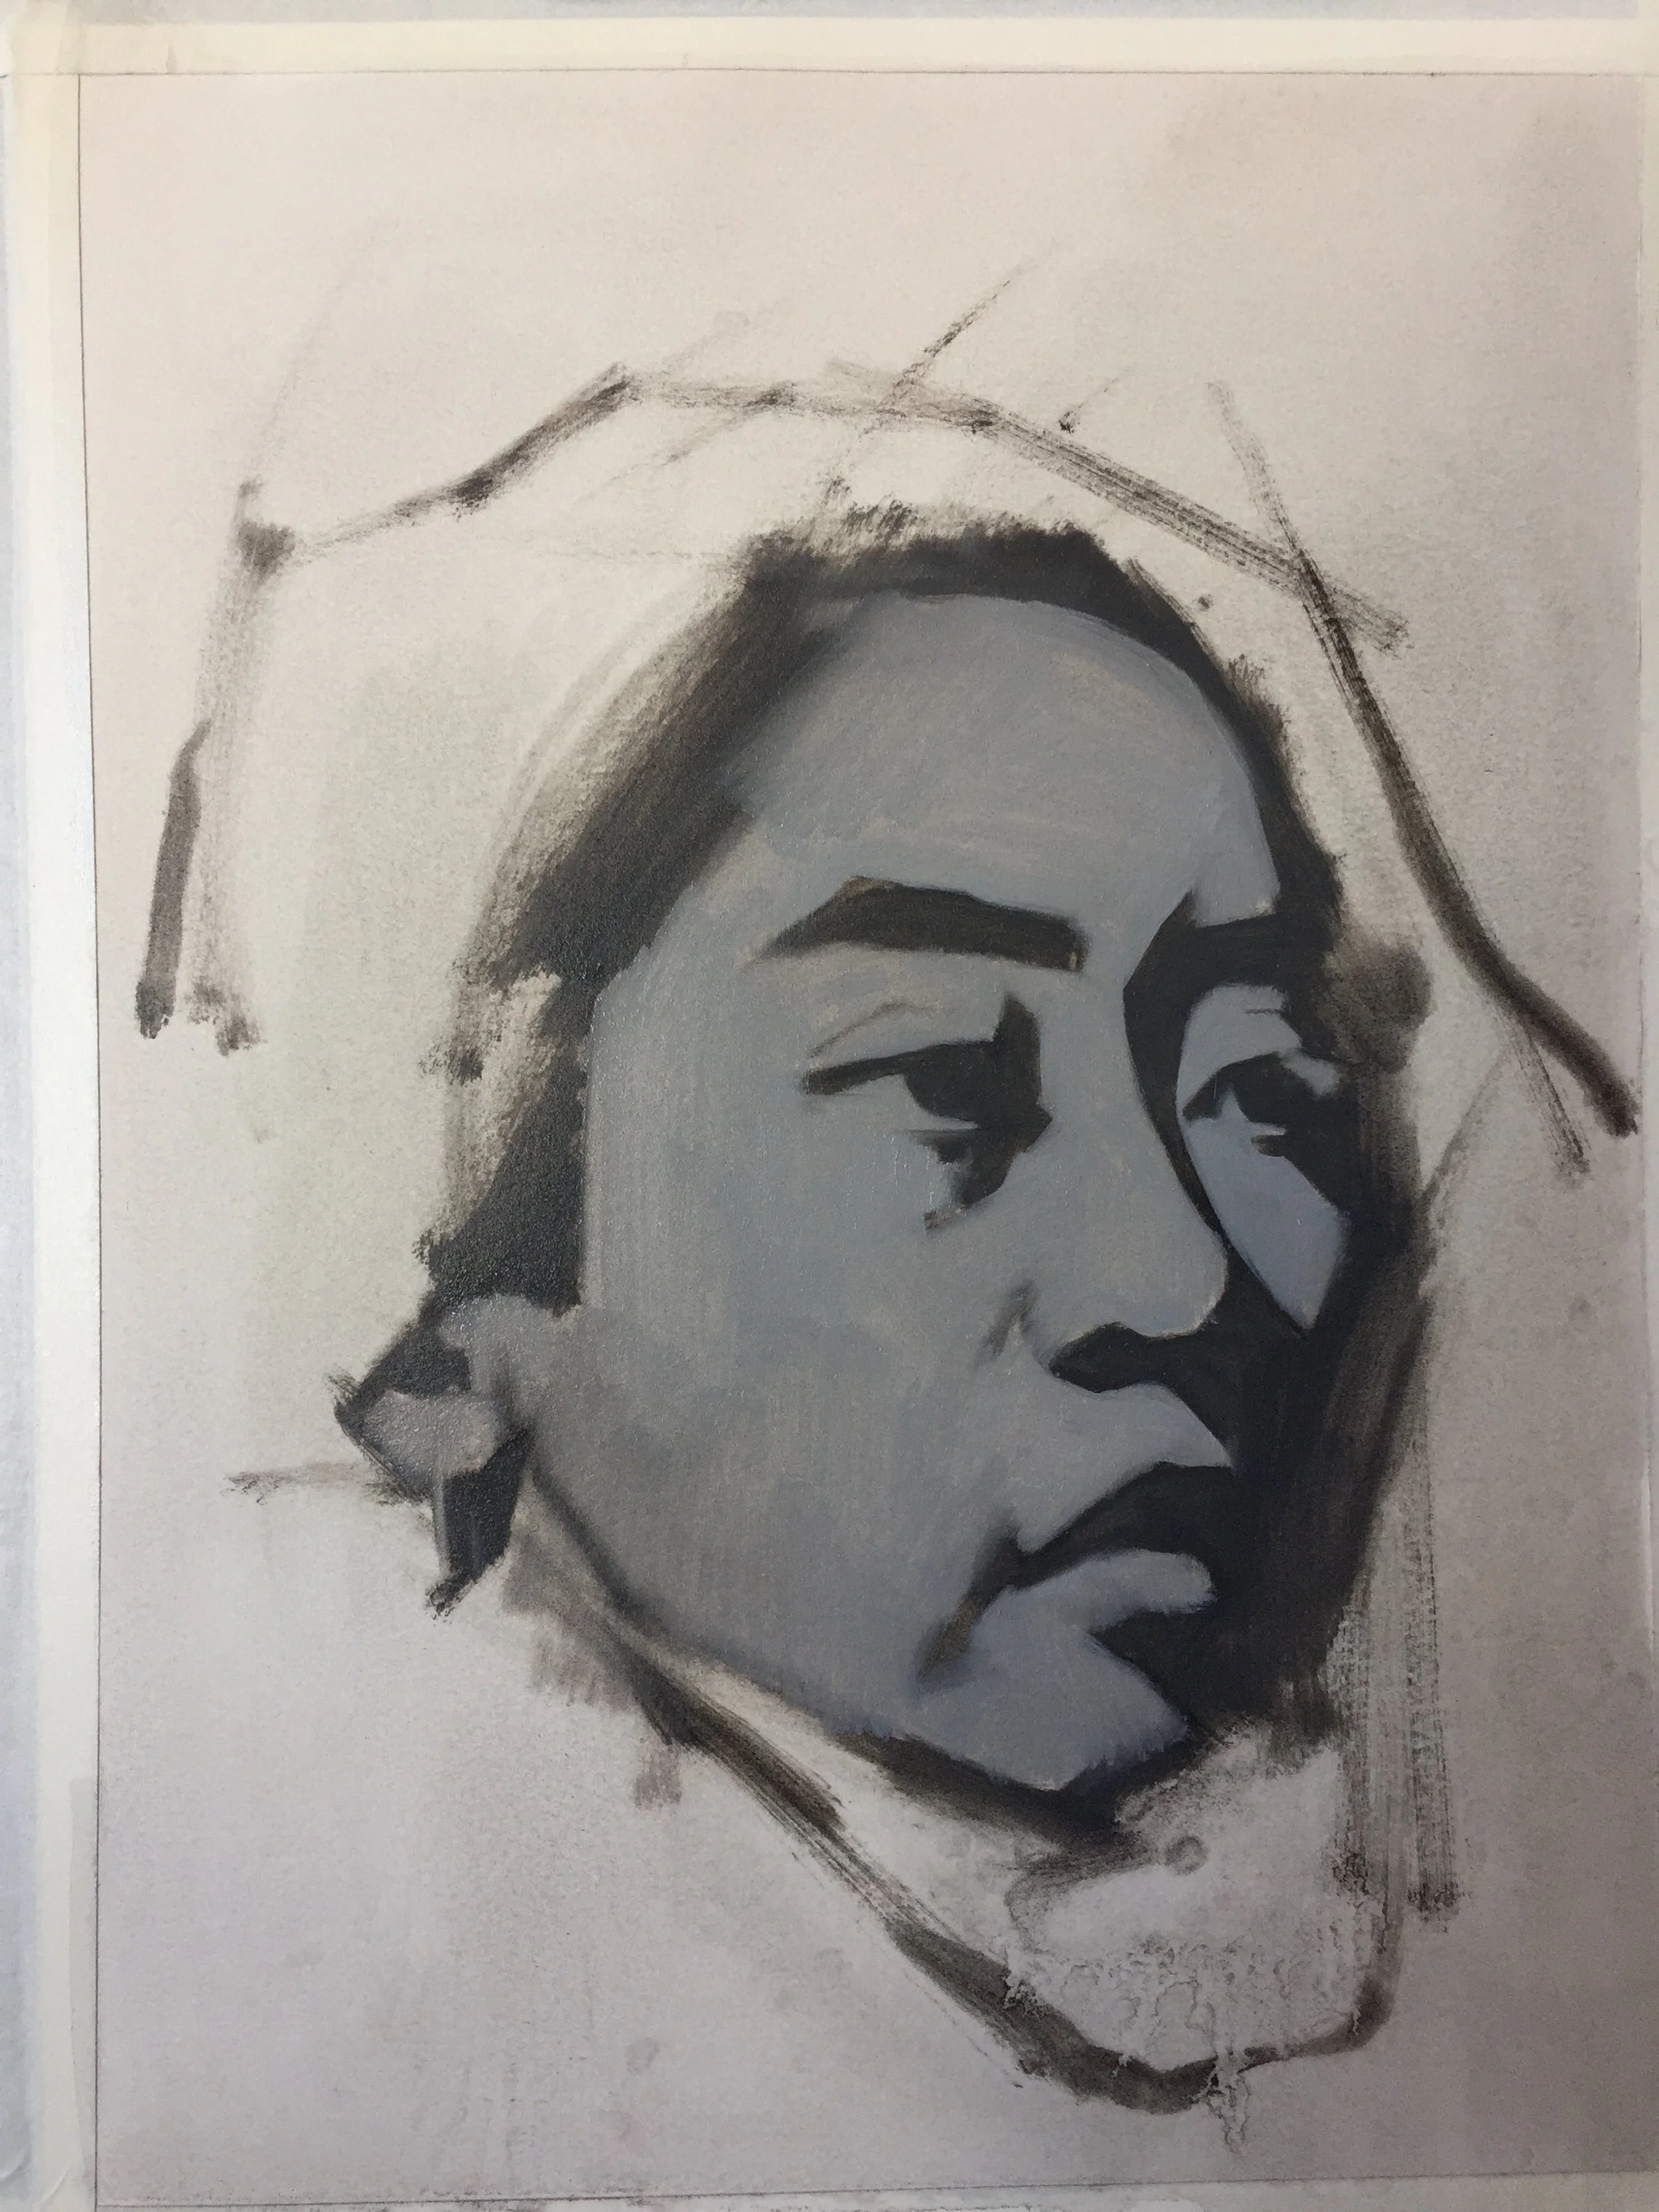
Step 3 - Now we will begin to consider the light side of the face. First mix the average light value for the entire light side. You should test your choice by placing only one brush stroke of what you have mixed directly beside your average dark color and consider its accuracy. If it’s wrong: adjust on your palette, test again with only one brush stroke. Continue like this until you are satisfied with your mixture. Then place your average light value over the entire light side of the face. Do NOT paint into your dark shapes! Keep your paint thin (thin not wet), as you will be building up and you don't want to saturate the support with a lot of slippery paint too early. At this point you should ideally have a likeness with the drawing and general values.
Note: I like to lean toward the dark side of the literal average for the lights because in alla prima painting we paint from dark to light.. starting darker means I get to move sequentially from dark to light within the lights. It’s satisfying to paint in straight chronological progress.
Step 4 - Next I like to begin with a focal point. 99% of the time this will be an eye in a portrait. Paint it to "finish" (what ever you decide is finished is finished). The eye is an excellent starting point because in that small area of the portrait you can usually find a full range of values and dynamic edges. So, you will be able to discover how you intend to resolve the entire sketch in this small area and then translate that information onto the rest of the portrait without risking ruining your strong start by experimenting all over your canvas.
Step 5
Move out from the eye (or initial focal point) bringing the rest of the light part of the face up to finish. Ignore the darks until you have completed rendering the lights up to where the lights just meet the darks. You may address the places where the lights meet the darks as well. I try not to jump around too much, instead traveling to the area nearest the last completed area and working on it next. As in: first paint the eye and next the cheek and next the nose....and so on.
To get feedback in critique club: make sure you photograph your subject from your point of view, AFTER you are done painting your study so that I can see it. collect progress shots of your work, one for each step. Write down questions as you do the study so you can ask them of me later.