Step by Step Portrait Painting -
Utilizing a Sargent Painting as Subject
Please read through to the end before you begin (like a baking recipe)
You will need:
A surface to paint on, I used a 12”x16” piece of Arches Oil paper. If you use a less absorbent surface you do not need to oil it, simply tone it with the paint and odorless mineral spirits (OMS)
A support for the oil paper if you’re using it
Artist tape to fix the paper to the support if you’re using it
Brushes, I use long flat bristles in small sizes 1-6
Oil paint in the Zorn Palette: Cadmium Red, Yellow Ochre, Titanium White , Ivory Black
OMS
*oil medium like walnut, linseed etc (only needed for the Arches Oil Paper)
A container for OMS (for brush washing), *and a smaller container for the medium if you need it. To make the oil medium mix approx. 50/50 oil and OMS.
Paper towels or rags
Instructions
Spend only 3 hours on this. Wherever you are at three hours will inform your next stab at the exercise. You build proficiency by learning economy and prioritization of action. A study isn't about "finish" it's about doing your best within the parameters.
Use the Zorn Palette (cad red, yellow ochre, ivory black, titanium white)
I would paint from a screen if possible, I have a monitor for this purpose because getting good color in print-outs is very difficult. There’s a large image of the portrait at the bottom of this page.
Set a timer for 25 minute painting sessions and timed 5 minute breaks in between. Stick to this NO MATTER WHAT. On the breaks turn your painting to the wall and DO NOT look at it until the break is over. Objectivity is your most important tool.
Follow the steps.
Don't forget that step 4 is to bring one small area to completion before moving onto any other area. This is the moment most of you can’t control your impulses.
Breathe and have fun.
Let’s Begin
Follow the photo examples and the following instructions together.
On “master copies”: By studying the work of skilled painters you can see their choices, how they organize and simplify. And if you don't have live models, this can be a very good way to study portraiture. For me “copy” can be a confusing term, I prefer to make studies that serve my goals by looking at the work of painters i admire. I am never suggesting that you try to make an exact copy. This is not a heist movie.
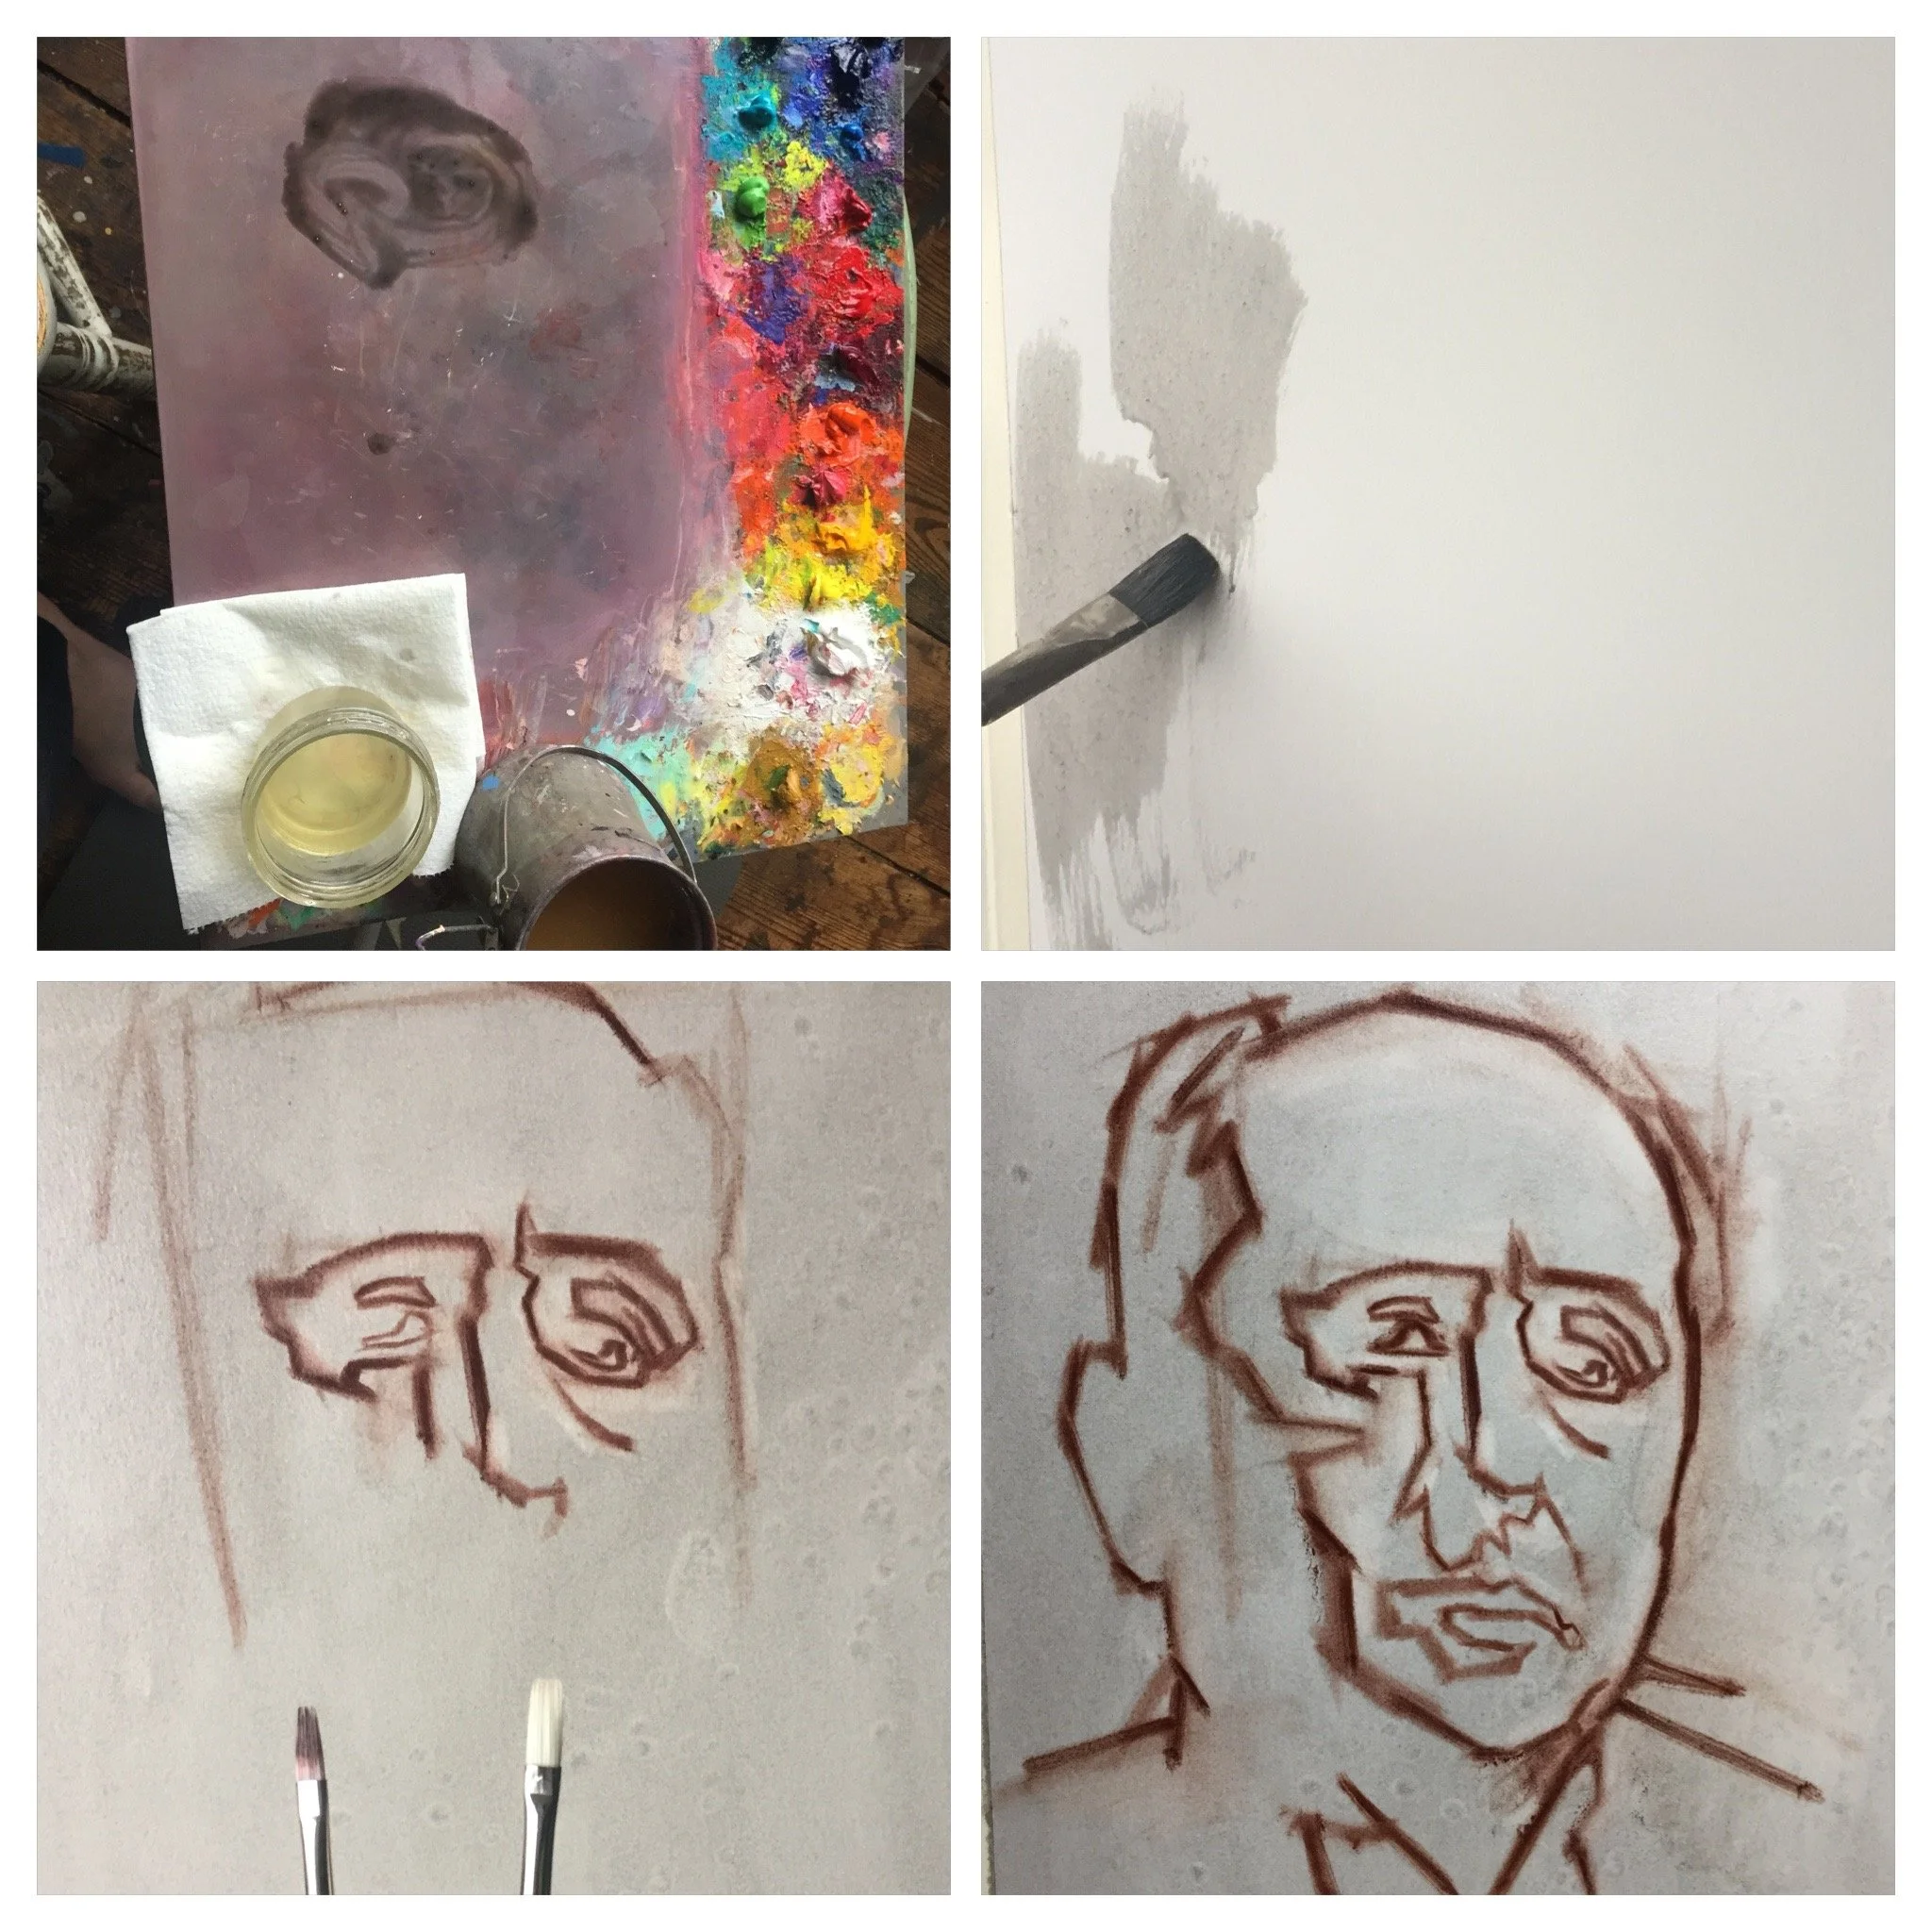
I wash my paper with a 50/50 oil-oms medium and a tiny bit of black paint, this allows "erasing" with a clean brush also dipped in the medium(for at least an hour before it soaks in).
Step 1.
I've chosen this portrait crop because of its strong and simplified organization of values, created by the single light source - which will make learning this method easier.
Mix up the average dark (average in value and color) of your subject. Remember that each subject is different so no formula for finding “average” will work in every situation. Think about which choice will allow the most ease going forward and don’t take the word “average” completely literally, it’s really a simplification of concept to get you started. Squint.
Use this to draw your subject, with a small stiff bristle brush. Draw with straight lines for greatest accuracy. Use dry paint, no medium, or very very little medium. You are drawing the dark shapes but not filling them in, DO NOT FILL THEM IN! • While drawing with one small bristle brush, I like to use another clean bristle brush with a touch of turp/medium on it as an "eraser", to help correct and perfect my drawing. Clean it thoroughly after each correction. • The way to apply this dark paint is thin/dry (not thinned by turp/medium, but pushed into the canvas with your brush) it should feel a bit like drawing with charcoal.
step 1
Step 2.
Once you have your drawing mapped out and all of your shapes are accurate, you may then fill in your darks with your average dark drawing color/value (unless you decide you need to adjust it for accuracy - then adjust first, then fill in).
Fill them in uniformly, you do not want to create many new values or shapes within the darks by haphazard fill in. Keep the paint thin and dry (but not so thin as to change your intended value). I do not thin it by adding oms , I simply scrub it in. For me, being in control of the consistency of my paint is one of the most important tools in creating successful work.
step 2
Step 3
Now we will begin to consider the light side of the face. First mix the average light, you should test your choice by placing only one brush stroke of what you have mixed directly beside your average dark color and consider its accuracy. If it’s wrong: adjust on your palette, test again with only one brush stroke. Continue like this until you are satisfied with your mixture. Then place your average light value/color over the entire light side of the face. Do NOT paint into your dark shapes! Keep your paint thin (thin not wet), as you will be building up and you don't want to saturate the support with a lot of slippery paint too early. At this point you should ideally have a likeness with the drawing, general values and color.
Note: I like to lean toward the dark side of the literal average for the lights because in alla prima painting we paint from dark to light.. starting darker means I get to move sequentially from dark to light within the lights. It’s satisfying to paint in straight chronological progress.
step 3
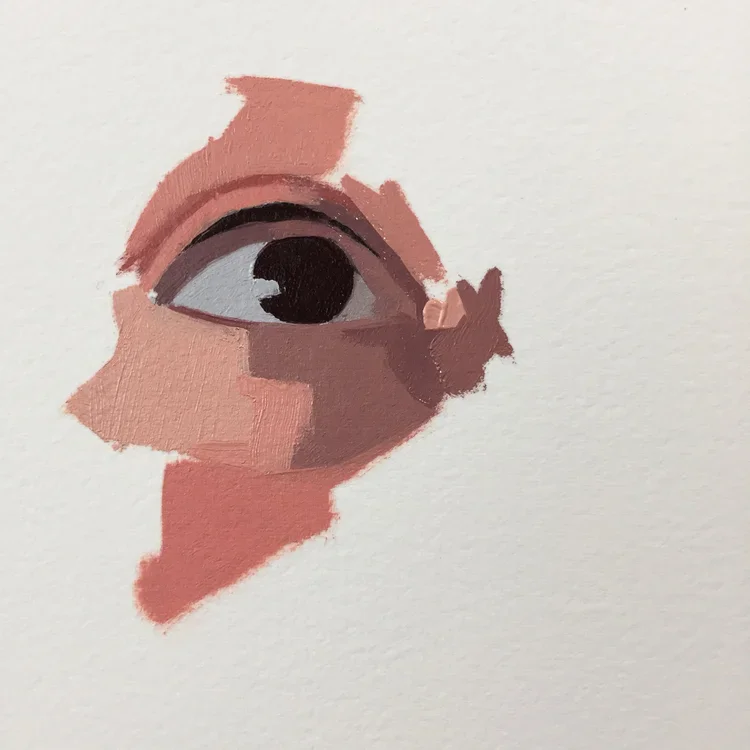
Step 4
Next I like to begin with a focal point. 99% of the time this will be an eye in a portrait. Paint it to "finish" (what ever you decide is finished is finished). The eye is an excellent starting point because in that small area of the portrait you can usually find a full range of values, dynamic edges, as well as both warm and cool colors. So, you will be able to discover how you intend to resolve the entire sketch in this small area and then translate that information onto the rest of the portrait without risking ruining your strong start by experimenting all over your canvas.
step 4
Step 5
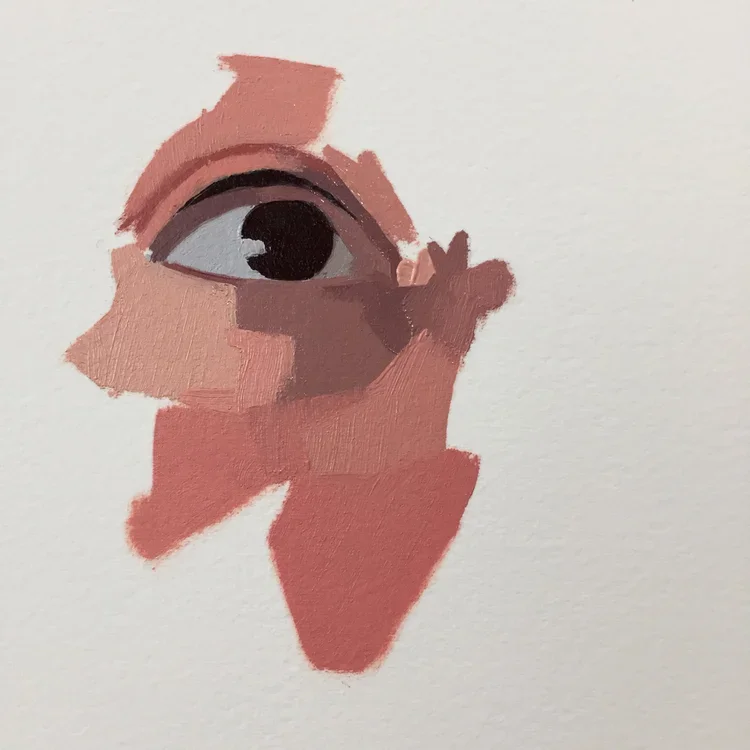
Now, move out from the eye (or other initial focal point) bringing the rest of the light part of the face up to finish. The reason I focus on the light first is that I know what is essential for creating a convincing portrait in a limited time and prioritize my efforts accordingly. I see way too many students get lost on the reflected light under the chin for example, wasting time, and flattening the image by losing the pattern the worked so hard to establish in steps 1-3. I’d recommend essentially ignoring the larger dark areas until you have completed rendering the lights up to where the lights just meet the darks. You may address the places where the lights meet the darks as well -(core shadow on the cheek for example), rendering these transitions (observing edge and color variety) will describe your form and give the 3D effect.
I try not to jump around too much-as in: first paint the eye and next the cheek and next the nose....and so on.
Other things to consider
You will see more detail than you can accurately paint in 3 hours. SQUINT! You must be able to see the most important relationships first, these are the aspects of your subject that are really necessary to record in order to paint a pleasing likeness. You can recognize a family member on a sunny day from a block away.. and it’s not because of their freckles.
Stop at your time limit. If you are painting in a class or uninstructed group, this is easy. If you are working on your own it’s much more difficult. 3 hours is a good amount of time to stop. It will be frustrating and you will fail many times, but when you’ve done it repeatedly you will find that it hones your ability to prioritize. You will become more economical with your actions and energy, creating your own solutions that are the beginnings of your personal voice as a painter.
When I developed this process for myself it was because I needed order and structure beneath my finish. But if you do not yet know how to finish I suggest you pause here and go have a look my Mosaic Exercise on Skool, under the “Testing Our Skill” lesson.
Here’s an couple of images from it to give you an idea
step 5
Three ways to utilize this lesson listed by increasing difficulty.
1) Make one painting. Start with referencing my step 1 image/instructions and moving through the progression of steps one on top of the other until you complete the copy.
2) Make a copy of Sargent’s (or my) completed painting while only referencing it and the written instructions and not looking back at the images of the broken down steps. This is best done after trying the above suggestion first. See if you can retain the concepts!
3) Make 5 studies (This will take much longer than 3 hours): The first is a copy of step one. The second starts as a copy of step one and ends as a copy of step two. The third combines the copying of all three steps… and so on. If you do this you will learn A LOT, but it takes some patience. I have assigned this to my students who couldn’t resist filling in the darks before they completed step one, to really drive it home.
Some tips & tools :
1) Take a break, step back and breathe. When you are breaking do not keep looking at your painting, you need to try to re-gain objectivity in order to see where you should make adjustments.
2) Re-simplify: if you lose the big light and darks pattern that you established in the beginning of your study, you may be focussing too much on detail, especially detail in the darks. Step back, squint, and then re-simplify. Scraping may also help if you have so much paint that things are getting messy!
3) Use a mirror or turn your painting upside down in order to gain a bit of objectivity.
4) Stop blending! It’s much too difficult to predict what will happen to your value and color if you are smooshing paint around continually on your canvas. Instead think: “One Color One Stroke”
5) Make sure you have ample paint on your palette at all times, if you run out STOP right away and put out more.
6) If you run out of clean mixing space on your palette STOP right away and scrape it clean.
7) Practice mixing with your brush. If you mix with a palette knife it is likely that you will mix large piles of paint that are not quite right... but you will use them anyways. If you mix with your brush you are likely to test for accuracy more often.
8) Make sure you clean your brushes often and always know what color is on your brush, you don’t want to use one brush the whole time (unless you are a brush cleaning NINJA!) and have surprise colors seeping out of it!
9) As you work through the steps, if you see that you must correct your drawing, value or color choices, DO. I correct and perfect my choices by tiny degrees the entire time. Try for a likeness in every aspect and you will know what the goal is.
10) Write down any questions that come up for you. This way you have points of focus for your next attempt.
*If you want a critique make sure to take pics of the exercise step by step, and not just at the end! See you in Critique Club!
