Still Life Painting
Lesson 4
Here we will be using Felicia's fundamental method that has been building in Lessons 1-3, adjusting it slightly for still life painting.
The difference is that a portrait/head has one basic local color and a still life set up may have many objects of unique local color. So instead of choosing only one average dark and one average light to lay in your composition, you will have the option to choose an average dark and an average light for each item of unique local color.
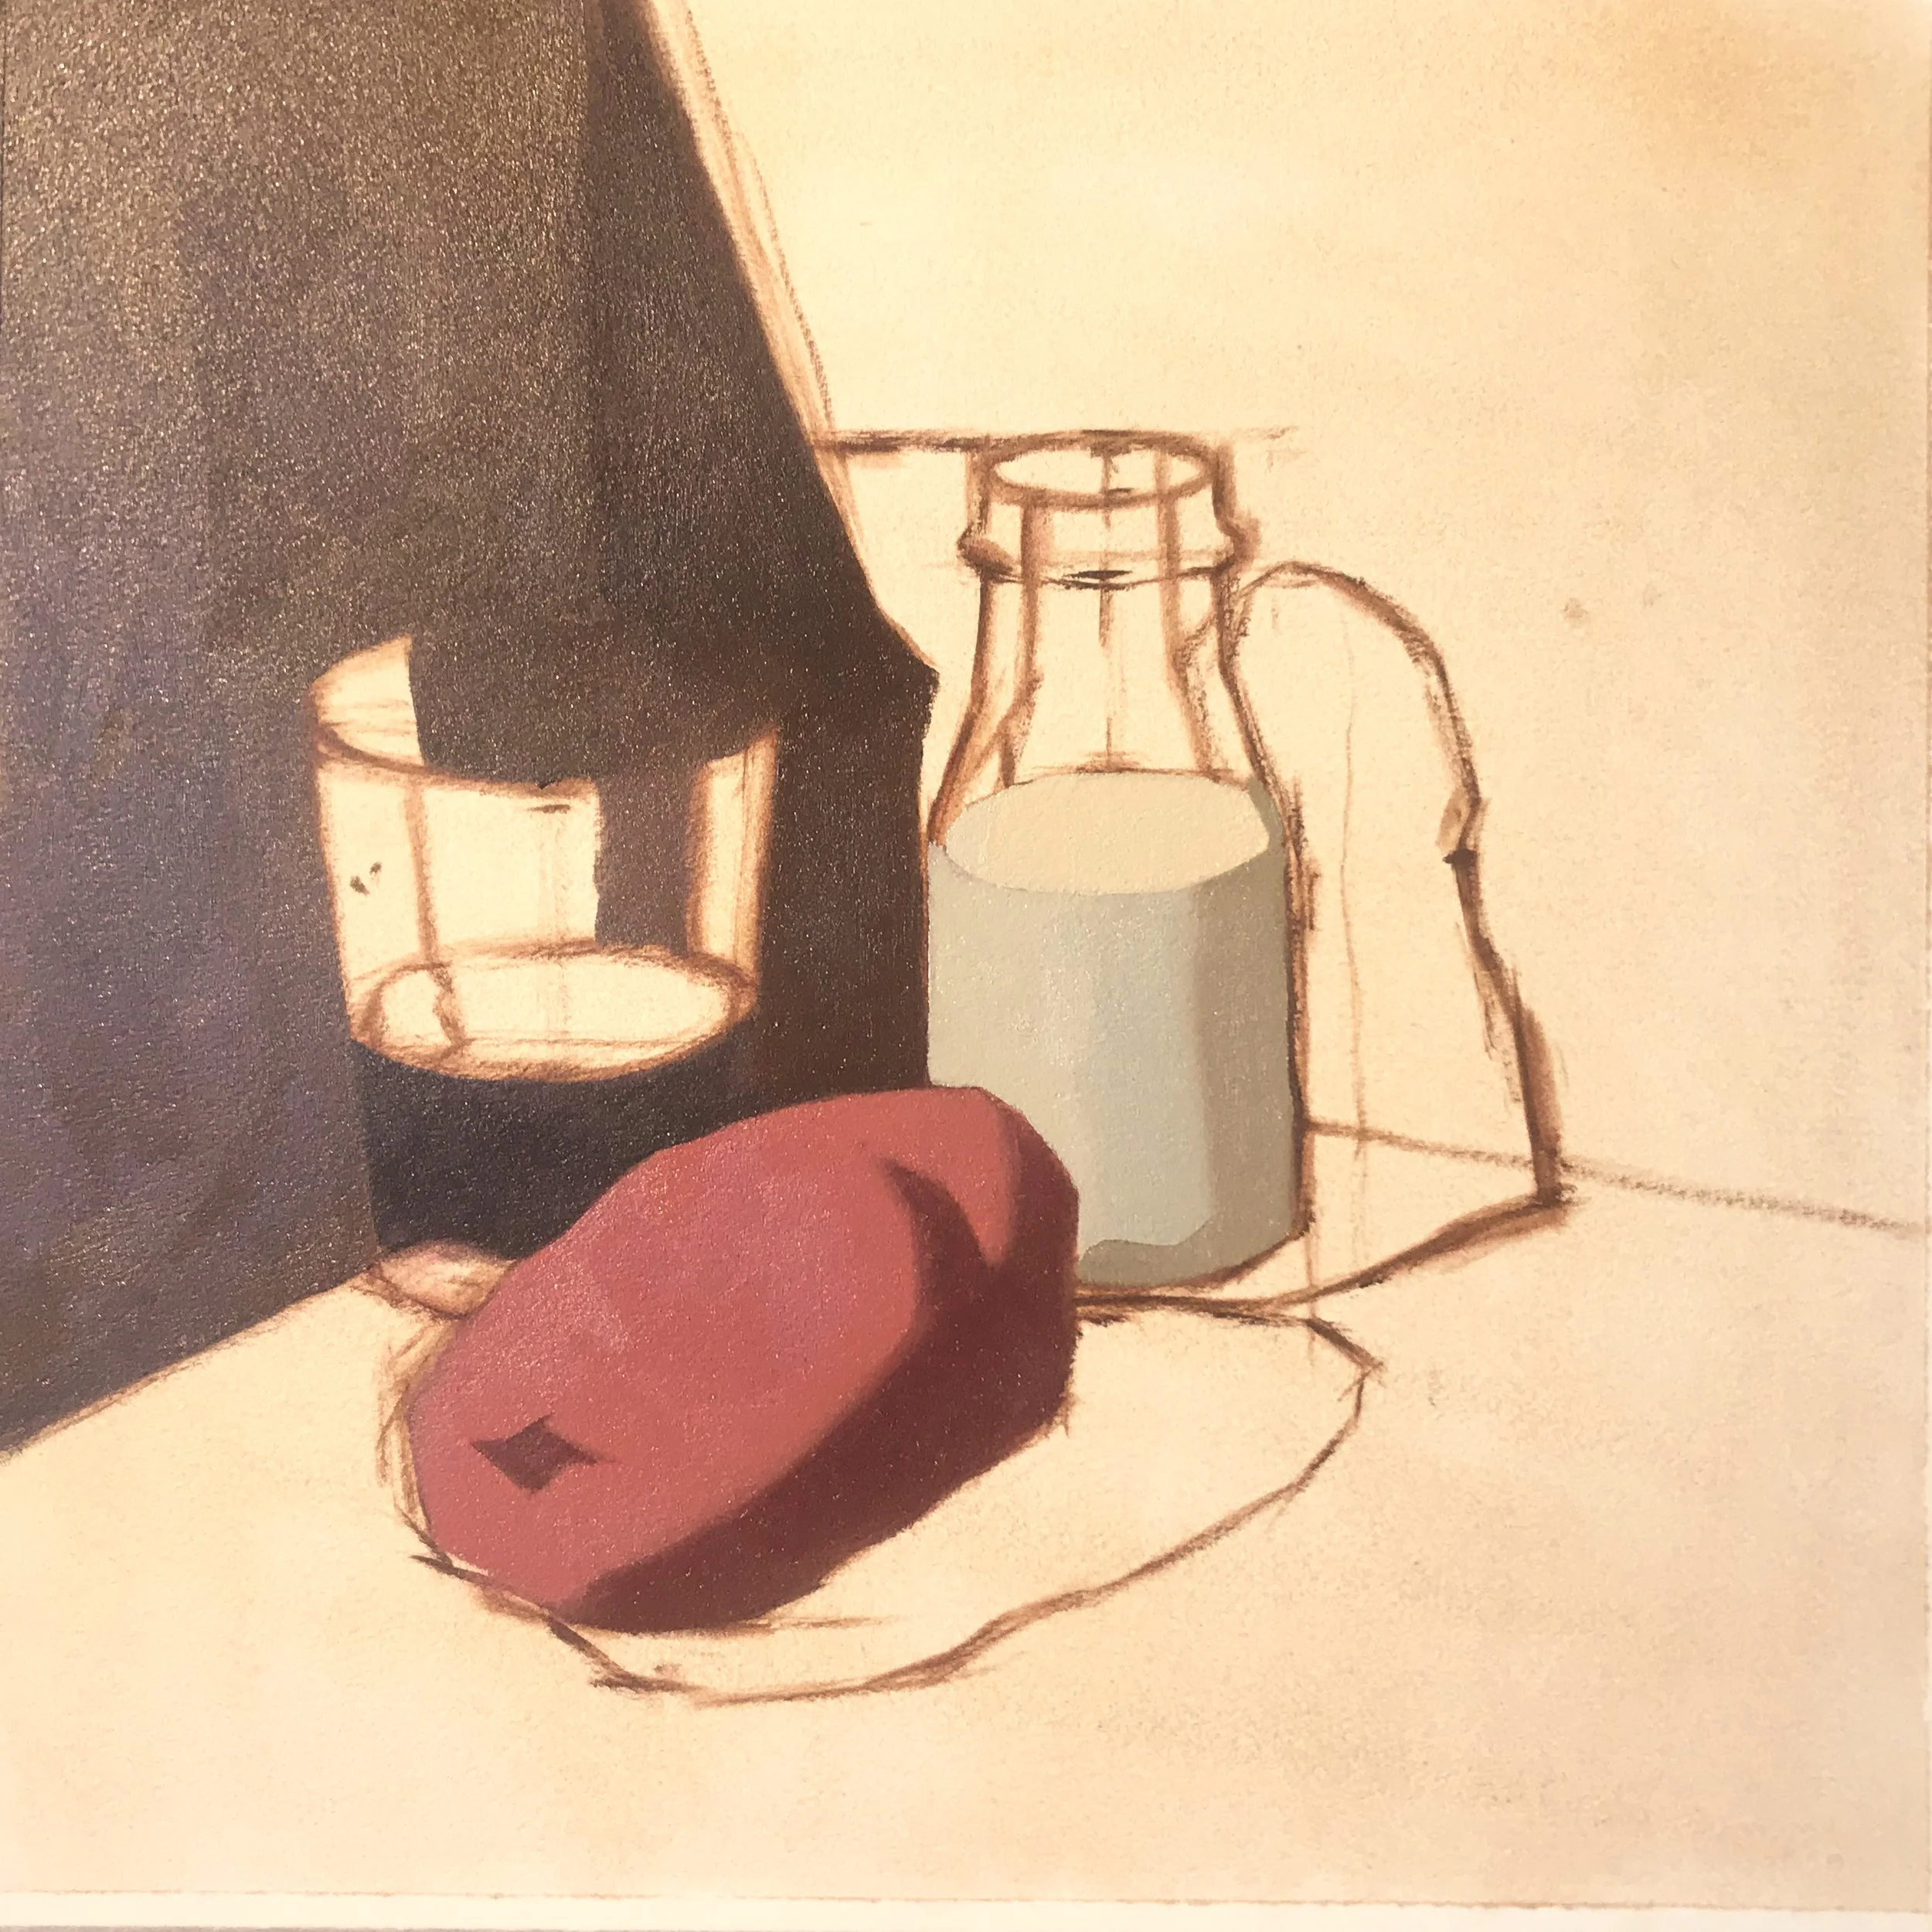
* Our demo images are brought to you by a student’s lovely efforts in 2021. Their name is Arie Dalleis and they gave Felicia permission to use their work as an example. Isn’t it lovely?! They didn’t quite get their photos taken right between the steps but you can make sure YOU do!
You will need
A surface to paint on. This study example uses a piece of Arches Oil Paper washed with 50/50 oil - OMS medium and toned with a neutral oil color.
A support for the oil paper if you’re using it
Artist tape to fix the paper to the support if you’re using it
Brushes, I use long flat bristles in sizes 1-6
Oil paint in the Zorn Palette: Cadmium Red, Yellow Ochre, Titanium White , Ivory Black (limited palette will make it easier to focus on the difficulties of this exercise. If you try it and you need more of a challenge.. go wild with your palette next time.)
OMS
oil medium like walnut, linseed etc if you like use it when you paint in oil. If I use one I prefer an oil medium mix - approx. 50/50 oil and OMS.
A container for OMS (for brush washing), *and a smaller container for the medium if you need it.
Paper towels or rags
a timer
Tip: to start- when you have different "average colors" for objects of different color, I sometimes still choose one average dark color to draw multiple objects in step#1 because it can be difficult to draw accurately while also remembering to switch drawing colors. In the process photos below you will see that Arie did choose this simplifying option. Then, when I start filling in average darks and lights.. I adjust to represent each object. Think on this and decide what is best for your set up. Can you imagine a scenario where using one drawing color might not actually be the easiest option?
Step 1.
Mix up the average dark (average in value and color) of your subject(s). Think about which choice of color/value will allow the most ease going forward and don’t take the word “average” completely literally, it’s really a simplification of concept to get you thinking. Squinting/blurring your vision will help simplify.
Use this to draw your subject, with a small stiff bristle brush.
Draw with straight lines for greatest accuracy.
Measure.
Carefully solve the drawing problems now so that you do not have to correct later when the canvas is thick with paint.
Use dry paint, no medium, or very little medium (if you are using the arches oil paper as in this example because the medium wash will allow the paint smooth application). The way to apply this dark paint is thin/dry (not thinned by turp/medium, but pushed into the canvas with your brush) it should feel a bit like drawing with charcoal. You want to have control of your lines, not a blurry, drippy mess.
You are drawing the dark shapes but not filling them in. DO NOT FILL THEM IN UNITL THE ENTIRE COMPOSITION IS COMPLETE AND CORRECT!
While drawing with one small bristle brush, I like to use another clean bristle brush with a touch of turp/medium on it as an "eraser", to help correct and perfect my drawing. Clean it thoroughly after each correction so it remains an eraser.
Instructions
Spend only 3 hours on this. Wherever you are at three hours will inform your next stab at the exercise. You build proficiency by learning economy and prioritization of action. A study isn't about "finish" it's about doing your best within the parameters.
I want you to paint a glass of milk, a glass of water, and one other object in the same composition (from life). Use a single, strong light source. Use clear glasses for the water and milk. Two of the same glasses if you have two. I'd recommend a simple surface to set the still life objects on and a simple background, because trying to paint patterns through a glass of water is tricky!
This also gives you a good opportunity to experiment with composition, be creative and set up something interesting within the parameters.
Light your still life with a single strong light source and guard it from any reflected light which may diffuse your shadow shapes.
Set a timer for 25 minute painting sessions and timed 5 minute breaks in between. Stick to this NO MATTER WHAT. On the breaks turn your painting to the wall and DO NOT look at it until the break is over. Objectivity is your most important tool.
Follow the steps.
Breathe and have fun.

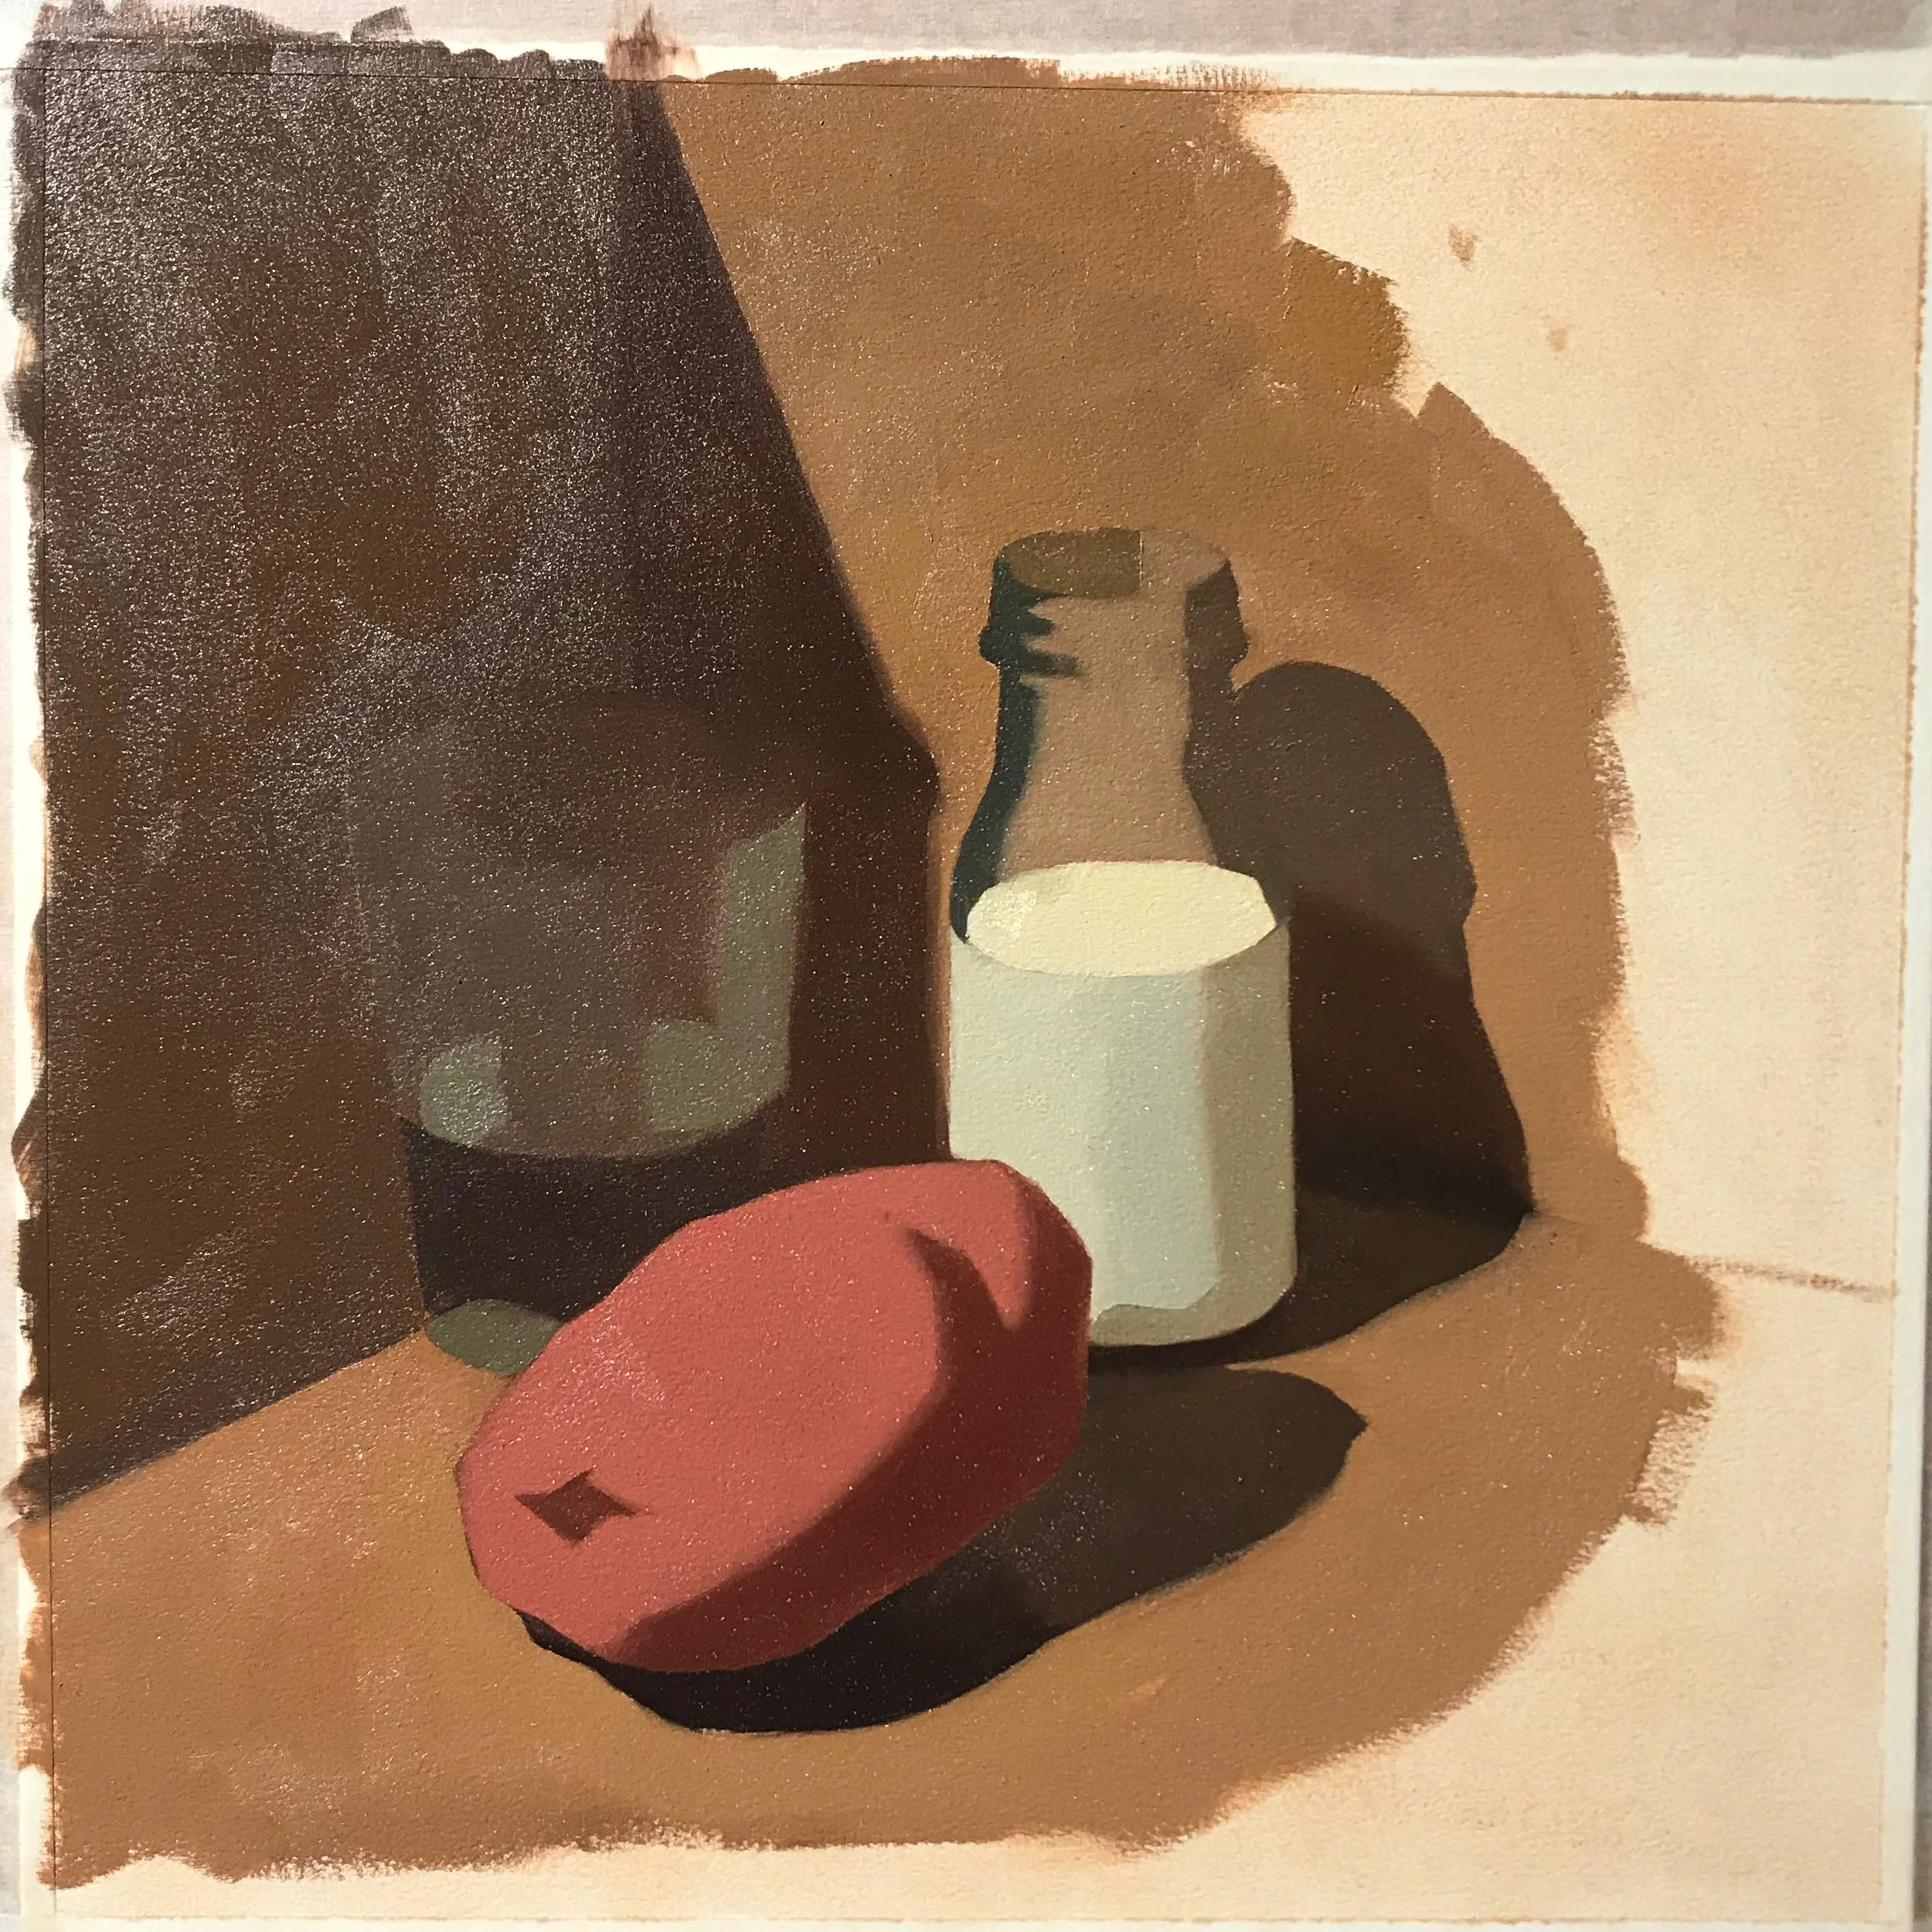
Step 2.
Once you have your drawing mapped out and all of your shapes are accurate, you may then fill in your darks with your average dark drawing color/value that you’ve been drawing with. Or you may fill the average darks in with several different average darks to represent each object of unique local color.
(If you start to fill them in and your average dark looks wrong when applied to a broader area, adjust it for accuracy - then fill in).
Fill your dark shapes in uniformly and completely, you do not want to create many new values or shapes within the darks by haphazard fill in.
Keep the paint thin and dry (but not so thin as to change your intended value). I do not thin it by adding oms , I simply scrub it in. For me, being in control of the consistency of my paint is one of the most important tools in creating successful work.
Here Arie began to fill in some of the lights before they snapped the photo for me. Can you tell which painted shapes are supposed to be left until step 3?
Step 3
Now we will begin to consider the light side of the objects. Mix the average light of one object and fill it in. But before you fill in you should test your choice by placing only one brush stroke of what you have mixed directly beside your average dark color and consider its accuracy. If it’s wrong: adjust on your palette, test again with only one brush stroke. Continue like this until you are satisfied with your mixture. Then place your average light value/color over the entire light side of the first object. Do NOT paint into your dark shapes! Keep your paint thin (thin not wet), as you will be building up and you don't want to saturate the support with a lot of slippery paint too early.
Move on to the next object and do the same.
No finish, detail, or rendering is appropriate until step 4.
At this point you should ideally have a likeness with the drawing, general values and color.
I’d say that Arie over complicated the lights in the milk jug here for step 3.
Step 4
Next I like to begin with a focal point, what ever is most interesting or whatever presents me with an easier/obvious path toward finish
. Paint it to "finish" (what ever you decide is finished is finished). This step is helpful because you will be able to discover how you intend to resolve the entire sketch in this small area and then translate that information onto the rest of the painting without risking ruining your strong start by experimenting all over your canvas.
Step 5
Move out from the initial focal point bringing the rest of the light part of the still life up to finish. Ignore the darks until you have completed rendering the lights up to where the lights just meet the darks. You may address the places where the lights meet the darks as well (the edges of the darks, the transition, the core shadows..). I try not to jump around too much, instead traveling to the area nearest the last completed area and working on it next.
*If you want a critique make sure to take pics of the exercise step by step, and not just at the end! See you in Critique Club!